New Zealand Synchronome

 I read with great interest the article ‘A Brisbane Synchronome’ by Brian Barkworth of Australia in your January 2005 issue, so thought it was about time that I put pen to paper. I am, I guess, one of your engineer clockmakers, doing my apprenticeship as a fitter and turner at the Derby locomotive works, UK.
I have always taken a keen interest in horology and all things mechanical, I am at the present time working for Ian Pilbrow and Son, Taupo, New Zealand, on clock repair and restoration.
Over the years I have built up a good home workshop with lathes, milling machine, dividing head for gear cutting etc.
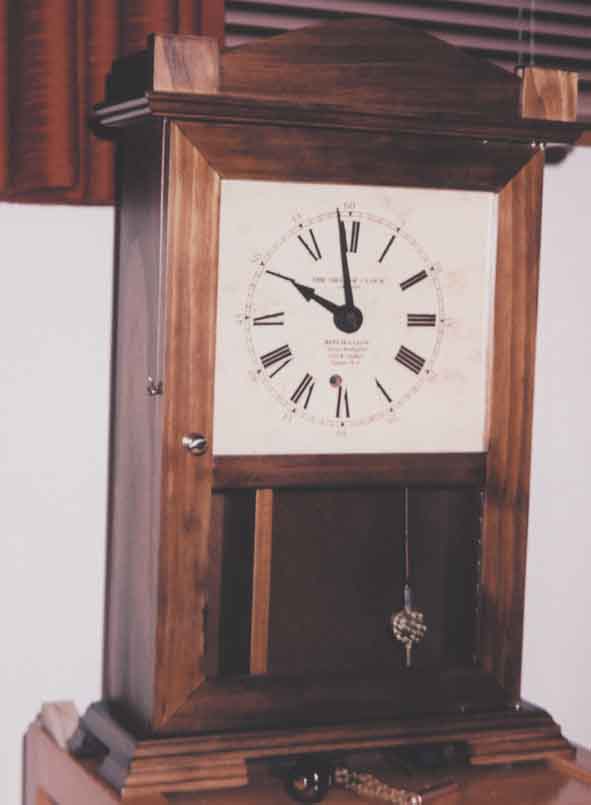
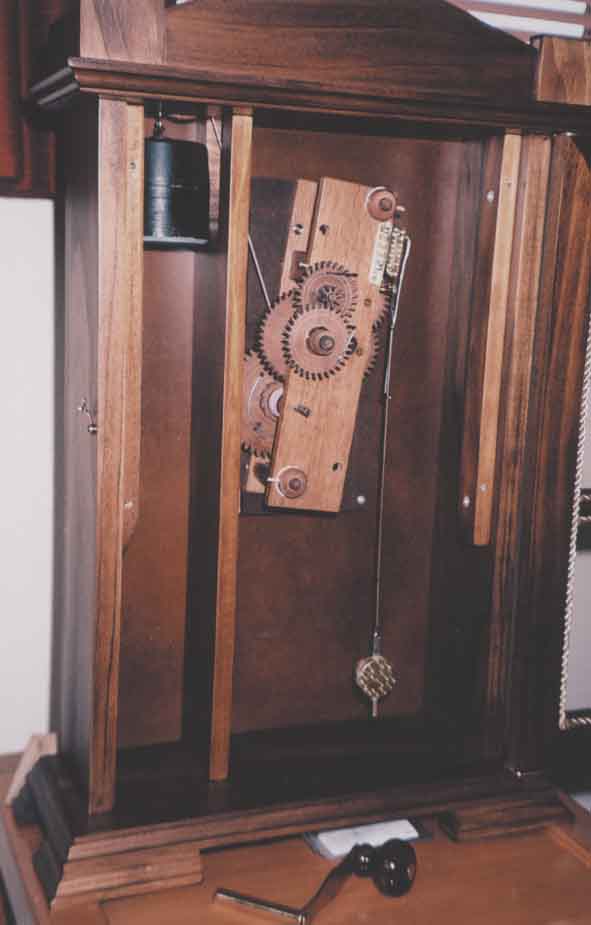
I found an interest in electric horology after completing two Eli Terry pillar-and-scroll clocks, plus the wooden geared movements (see photographs).
I then came across plans in an old Model Engineer magazine for the building of an electric Synchronome clock, as made by F Hope-Jones.
Where did I start? I managed to get some soft iron slugs for the cores of the coils from an old Post Office relay box. Also a radio ham friend gave me some vintage double cotton-covered wire of the correct swg. I then wound the two coils dead slow on my lathe, with the help of my wife operating the main stop-start switch .
The main back plate was cut from 1/8in thick brass then marked for hole positions and mounting blocks etc. Next I machined the one gear, the 15-tooth wheel, cutting the teeth using a home-made fly cutter .
The rest of the fabrication was just an exercise in fitting and toolmaking. The latch is silver steel (heat treated) as also is the roller, and the pallet is machined out of the solid, the curve cut by a milling cutter of the right diameter.
The main contacts are from a car contact set (tungsten).
The bob weight is 14lb of lead, poured in my own workshop, welded up and machined. I lacquered this. I think the bright steel is a good feature.
The pedulum rod? The plans said Invar rod, nickel iron—all very nice, but this is New Zealand and believe me we are at the end of the food chain! I did manage to source a supply in the usa however it was going to cost $400 to get 48in of 3/8in diameter rod to my door—too expensive for me—so I have used 3/8in mild steel. Unfortunately the expansion rate is ten times that of nickel iron, so if anyone has a suitable piece they don’t need I would be grateful and would cover costs.
What about the slave? This does not appear to be included in the 1968 plans! I contacted the Model Engineer by email and they came back to me saying that in error they did not print that part, however while on holiday in the Bay of Plenty I was told of a Sychronome working in a doctor’s surgery, so in I went to have a look and introduced myself to the engineer, who had been the Chief Engineer at the now-defunct hospital (also an ex-Derbyshire man) who kindly lent me a slave unit so that I could copy same, as the whole clock was to be of my own manufacture. I also made some parts for their clock (ie latching springs).
The latching is using 13.8 volts DC supplied by a lead-acid battery charging from an old telephone charger made for that purpose, again all junk from the dump.
Now, about the noise every 30 seconds, I used leather pads cut from and old pump cup washer plus felt ends; it sure made a difference.
The case was made of three-quarter mahogany sides and back to try to keep noise levels down, one main thing I used was soundproof glass: it’s 7mm thick laminated with plastic in between—at great cost, I might add.
The clock is in the lounge and is still very noisy despite my best silencing efforts. My wife cannot live with it, so it’s for demonstration purposes and looks only. It sure is a lovely instrument with all the machined brass and bright steel. All the brass parts are machine-turned, which gives it that scientific instrument look. It kept perfect time while it was running in my workshop despite not having an Invar pendulum.
Tony Rodgers, New Zealand
|

