Making and repairing clock dialsby Brian Barkworth, Australia
Download a pdf of this article
English dial clocks invariably have large dials so the condition of the dial, being the face of the clock, is even more important than usual. If time and age have inflicted scratches, oil stains, crazing, flaking, and/or faded and rubbed away numerals, they can spoil the clocks appearance and be very hard to live with. Of course, a little crazing and age-related patina can give authenticity and character and actually add to its appeal, and originality should be preserved whenever possible. The decision to leave alone, patch up or repaint can be a big one. If the clock is a valuable one, or of historical importance, then it may be best left alone, and totally original. This article is not concerned with such rare antiques.
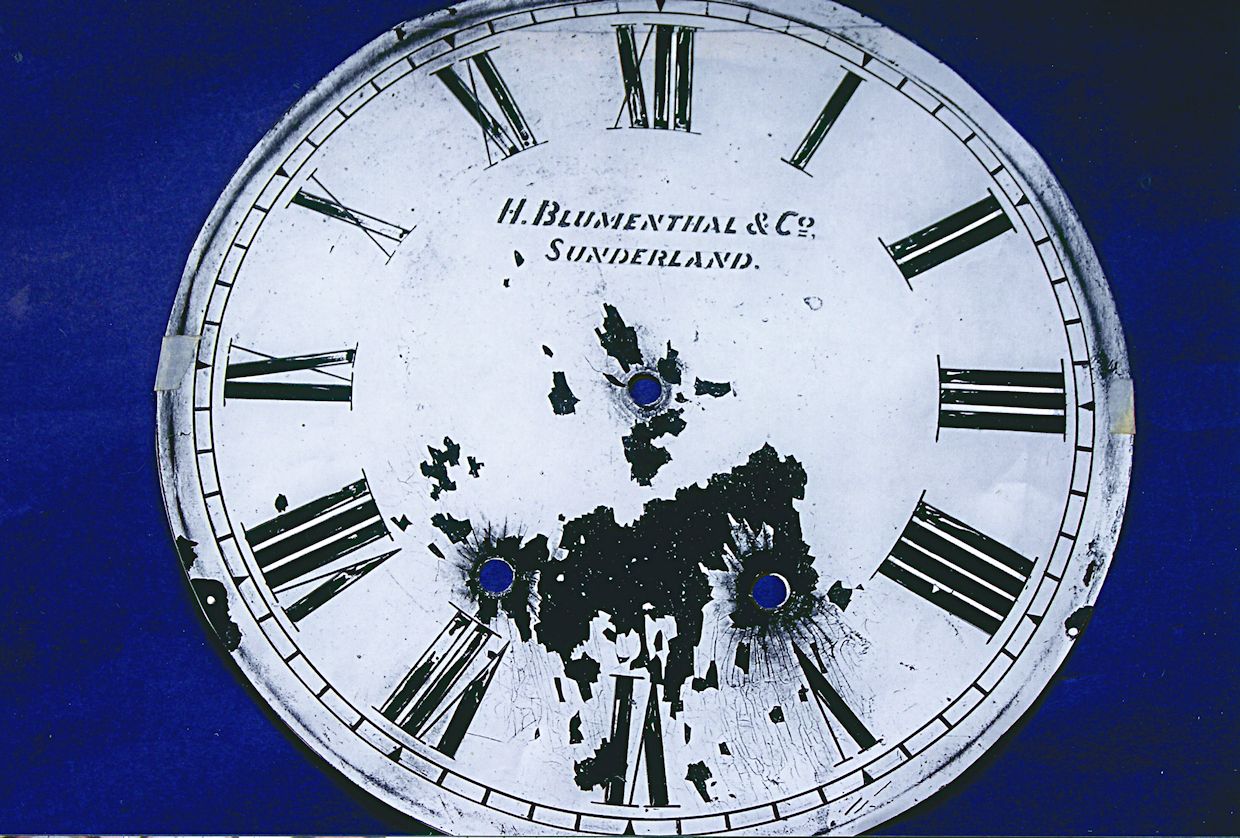
Figure 1 shows a more ‘everyday’ dial, one that is flaking badly and just touching the surface results in more paint falling off. Such a dial could well be a candidate for repainting. If doubt, or guilt, make you hesitate, then one ploy that I have used many times is to copy and make a completely new dial. The original dial is positioned underneath the new dial if possible, or kept separately with the clock. I generally aim to produce a dial that does not look too new, or bright and shiny like a new reproduction dial that is printed and perfect. Rather a dial that fits well with the rest of the clock, looking like an original in good condition.
I think that the average Clocks reader should be able to make such a dial, with Roman numerals, if he (or she) works in a methodical and patient manner. If the dial has Arabic numerals then it can be much more difficult, depending on the particular style and the readers’ level of artistic ability.
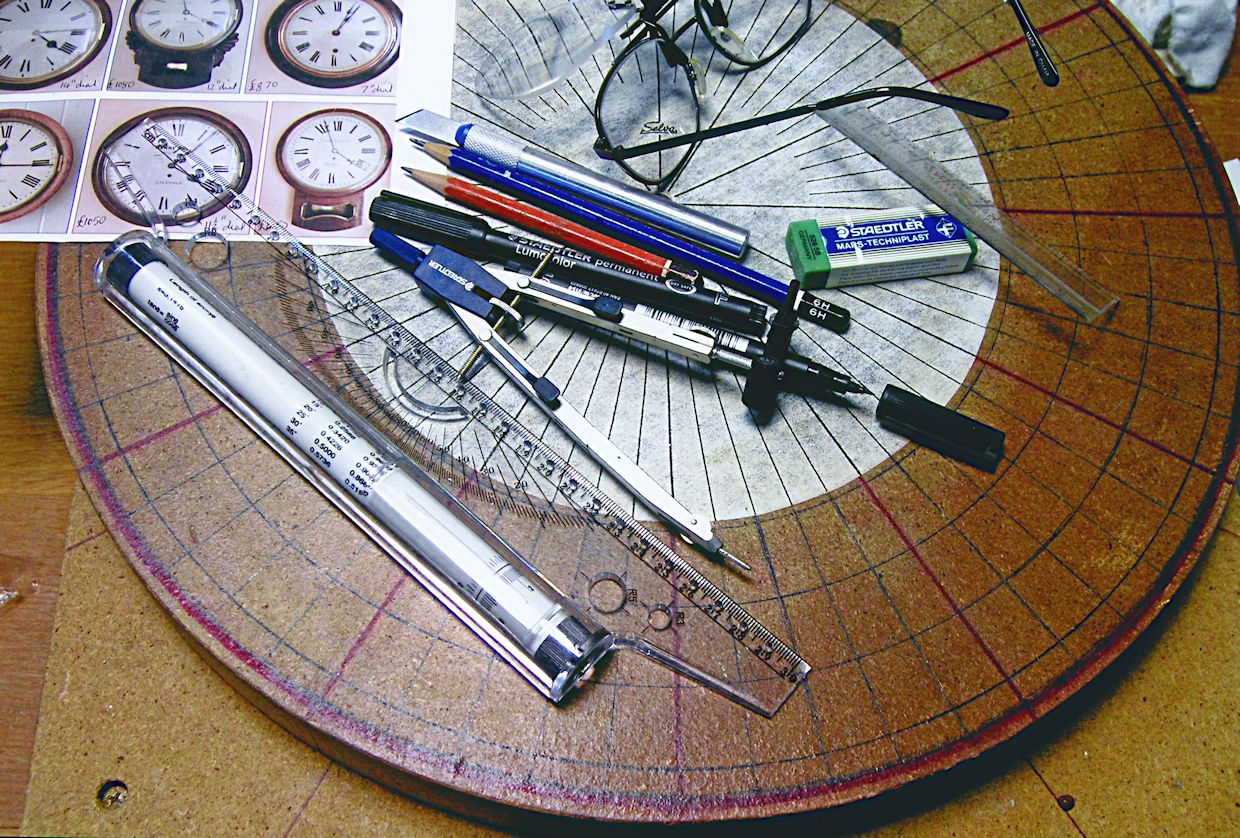
If making a new dial, the dial itself can be made from a choice of several materials. For a dial for an old clock you could use traditional materials such as wood, iron/steel or brass and for a new clock you could additionally use aluminium or a plastic/synthetic based material. Be sure to use the right base coat or undercoat to suit the material before applying the top finishing coat ready for lettering the numerals and any additional blackwork. For the style and size of the numerals you could use a drawing or tracing taken from a suitable clock or dial that you decide upon. Take note of the desired thickness and length of the numerals to suit the result that you want. There are a few examples of English dial clocks visible in figure 2. This will avoid the difficulties inherent in spacing, proportion and radial placement of the numerals on the dial if you draw up your own. Some Roman numeral dials have the numerals sloping into the centre of the dial to correct an optical illusion that works the opposite way.
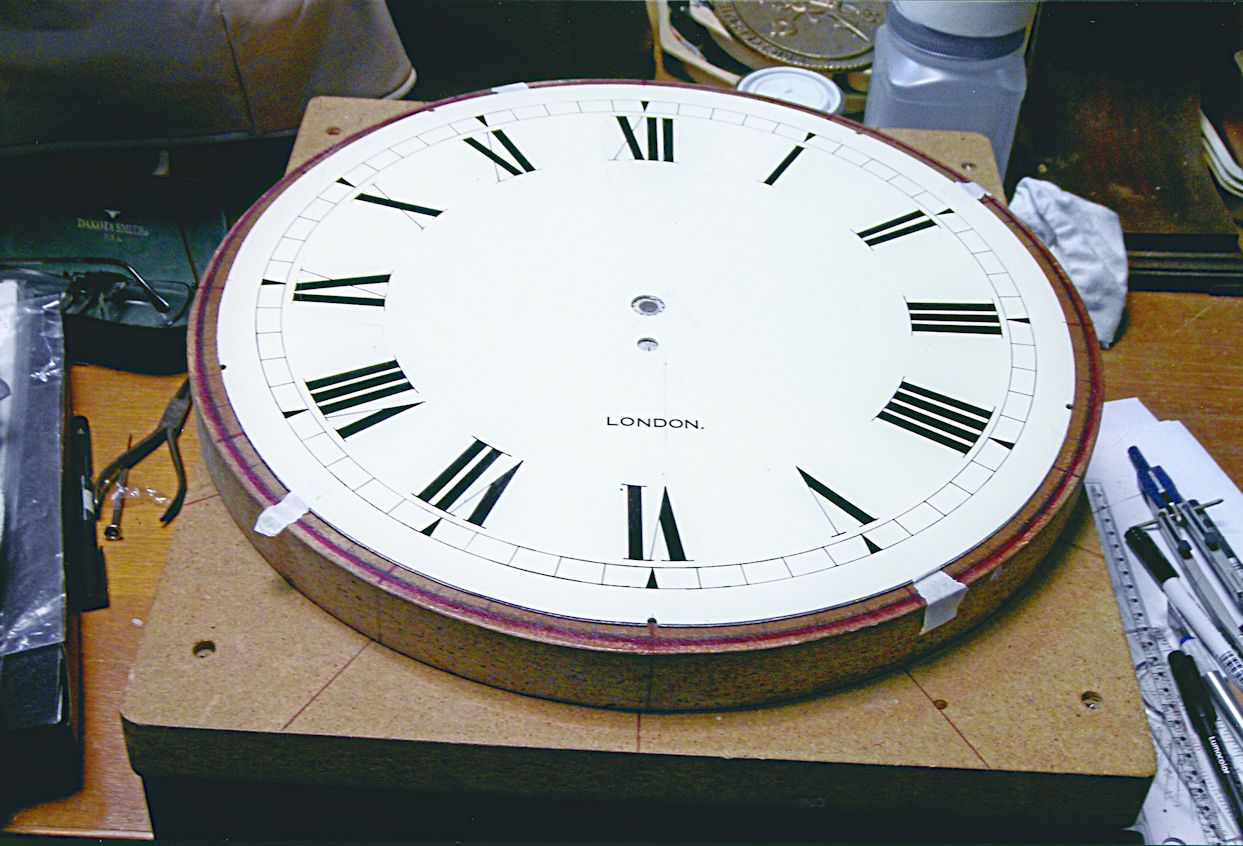
The dial that I am using to illustrate this article is quite a large one at 16in (40.5cm.) diameter marked ‘London’ underneath the winding hole, and is part of an otherwise run-of-the-mill English dial clock with spade hands, and an unmarked single fusee movement of about 1930s vintage.
If repainting a damaged dial, make a tracing of the blackwork and other markings that still exist, with as much detail as possible. Do it as carefully and accurately as you can. You can also photocopy the dial but be aware that distortion occurs on many copiers.
Now prepare the surface by scraping or sanding as needed to remove any irregularities or rust etc. Rust can be further neutralised by brushing on a phosphoric acid rust converter to provide a stable base ready for priming the surface, and holes can be filled with an automotive filler before sanding flat.
Finish by using water with fine wet-and-dry paper and finally dry the dial thoroughly, ready for the finish coat. The illustrated dial was sprayed with several light coats of automotive paint, in a suitable off-white, almost cream, colour. A more traditional use of brushing or dipping enamel can be used, of course. Spraying does leave a minutely dimpled surface which is easily recognisable and if this is not wanted it can be ‘flatted’ with further use of water and 600 to 1200 wet-and-dry paper.
The dial is now ready for adding the blackwork numerals and lettering. Bearing in mind that a badly lettered dial looks really awful we could pause at this stage to be certain that we are well prepared to carry out the next bit. With care and attention to detail, I see no reason why a dial with Roman numerals cannot be well achieved. Most Arabic letters are more difficult and really require some artistic ability, practise and confidence to achieve the deft freehand curves to give a result that will please you.
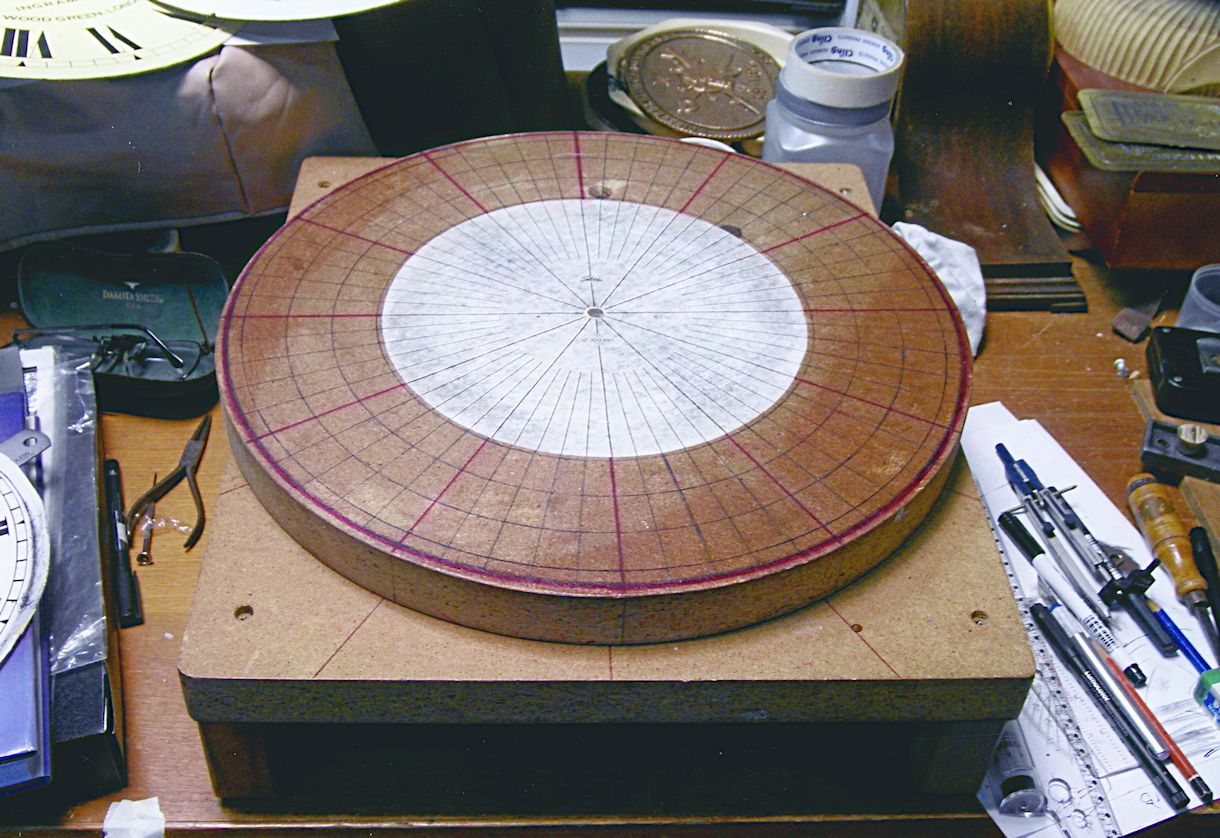
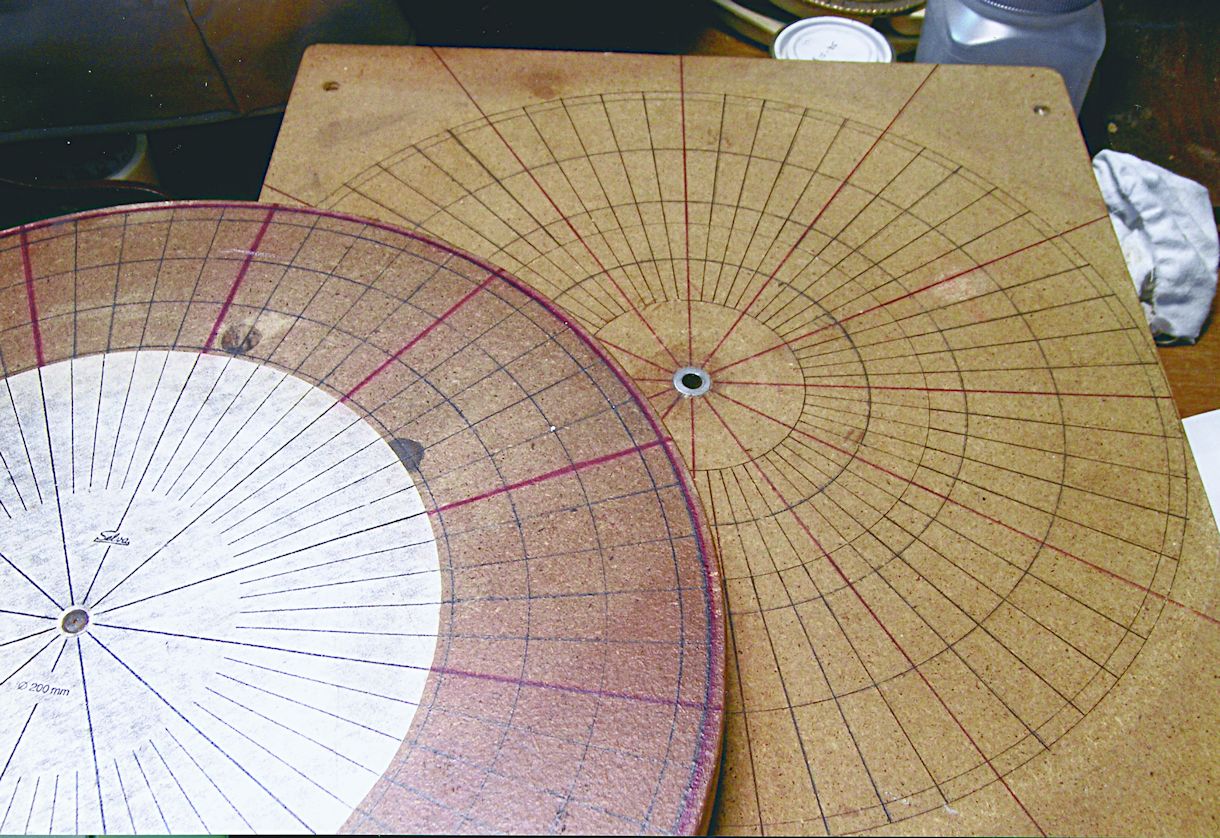
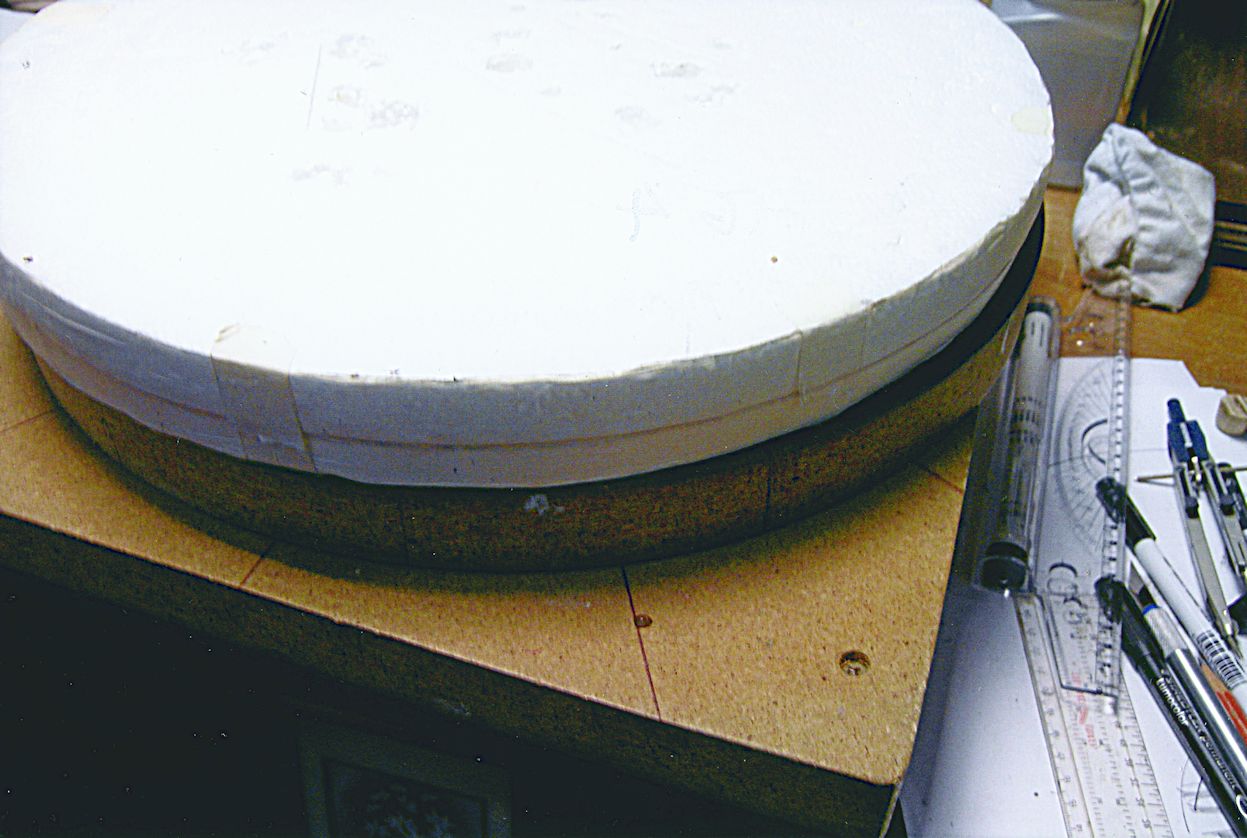
Figure 2 shows the few tools that are needed. A short list would include a work table (more on that shortly), tracing paper, a clear plastic ruler, compasses, craft knife with a sharp pointed blade, a hard 6H pencil, a softer HB pencil, an eraser, some form of magnification, and a couple of fine point ‘permanent ink’ felt type pens, such as the Staedtler Lumocolor F. I have found that the latest ‘felt’ pens work very well. The finest points make a very fine line, the ink is very black and dries virtually instantly. If needing to take the more traditional route then use Indian ink, a mapping pen and a couple of fine sable hair brushes. I do quite a lot of dials so I have made myself a stand and turntable, somewhat like the one illustrated and described by M F Tennant, on pp183 and 184, of her book Longcase Painted Dials, figures 3, 4 and 5. The 17in square table is made of thick MDF, has legs about 4in long in each corner and a hole in the centre. It is marked out, right to the edges, with clock-face hours and minutes. It can be used without the circular turntable. The circular turntable is made from the same material and has a pin fitted underneath to fit the table. It is also marked out with hour and minute lines. Note that for dials that have mounting pillars fitted underneath them, I use packing case Styrofoam, cut to fit, and taped to the turntable with masking tape. The dial can then be pushed down on to the Styrofoam and the pillars will hold it in place. When the Styrofoam becomes peppered with holes it is discarded and replaced with a fresh piece. It all works very well and allows you to work on and mark out a dial quickly and accurately with maximum convenience.
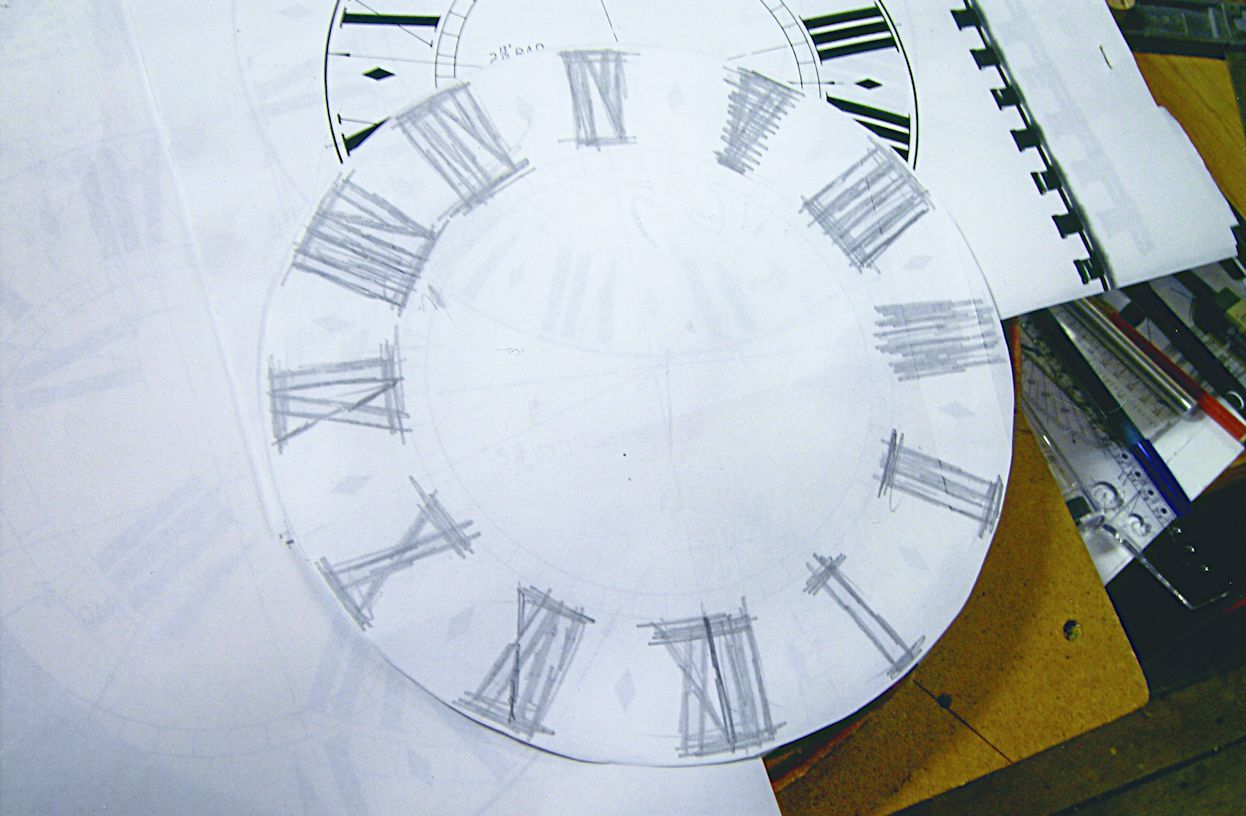
If you have a tracing of your dial, or have copied or drawn one that you wish to use on a new dial, this can now be made ready for marking out directly on to the freshly painted but thoroughly dried dial. Scribble with the HB pencil on the back of the tracing, figure 6, before taping the tracing to the dial. Carbon paper makes a too dark, smudgy and hard-to-remove image. Double check its placement. It is very easy to get it skew-whiff or even upside down and end up with 12 o’clock where the 6 should be. Here speaks the voice of experience!
I like to use magnifying glasses fastened to my normal glasses and work about 6in away from the subject when doing the finer bits. Figure 7 shows the result of close work and concentration with the result of marking out the numeral 1 in the wrong place! I even inked in the outline before becoming aware of it. Luckily I was able to scratch away the inked numeral, lightly rub over with 1200 wet-and-dry and then re-trace and line out the numeral in its correct place. Actually, it was making this mistake that gave me the idea that an article on dial painting may well be welcomed by readers of Clocks. Even so, R E Rose, in English Dial Clocks writes (p179) that ‘some clocks are unusual simply by virtue of human error which has not been corrected. Several have been found which repeat the same numeral twice and engravers often misspelled …; You can follow that path if you choose!
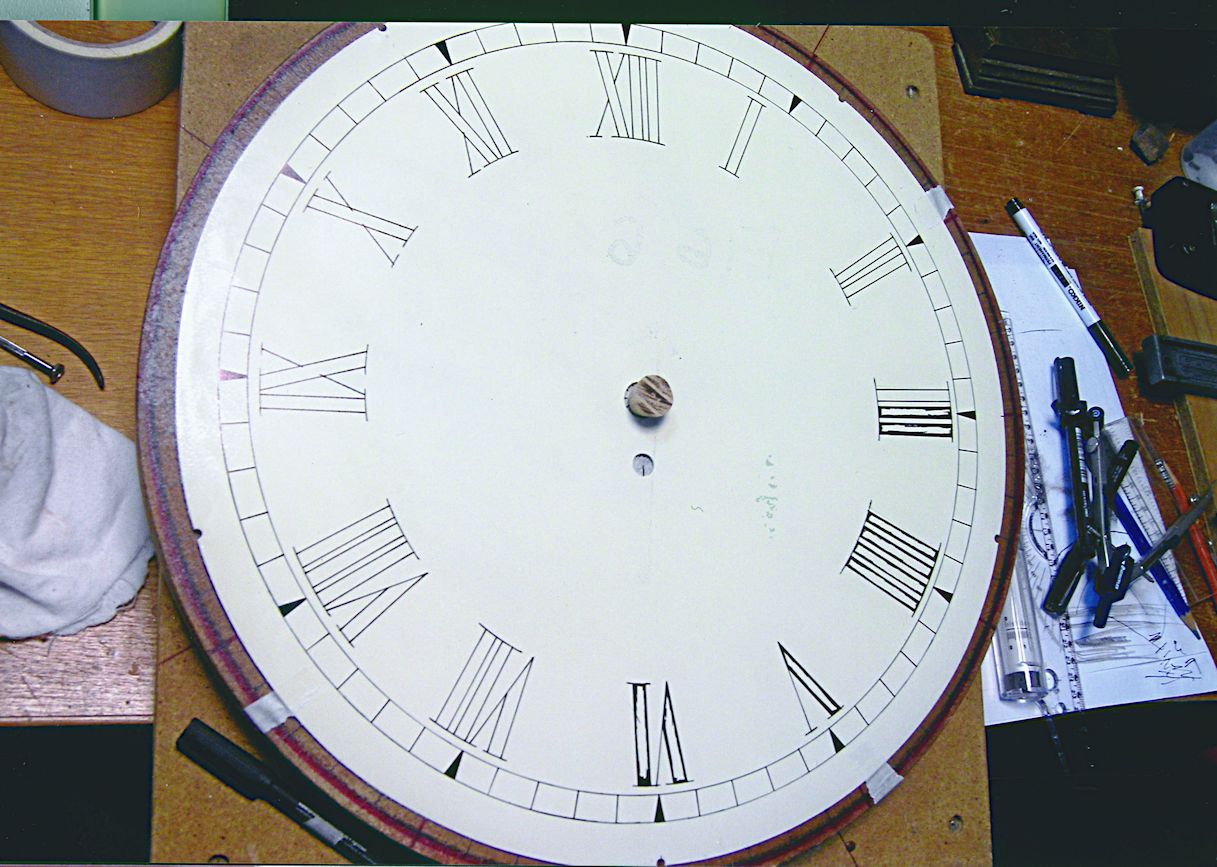
Use the 6H pencil and compass to first do the minute circles and numeral serifs, then the 6H pencil and ruler to trace the numerals on to the dial. It is important to turn the dial around, as you go, so that the pencil is always working in front of you and you can clearly see what you are doing. This is where the turntable does its job.
Use the compass and do the minute circles and the numeral serifs first with the black ink. Again, you may follow tradition and use Indian ink with a drawing pen. Practise first with the drawing pen and adjust the pen to make the fine line required. Add in the hour and minute marks turning the work as you go. A piece of clean scrap paper under your working arm will keep the dial free from marks and scratches.
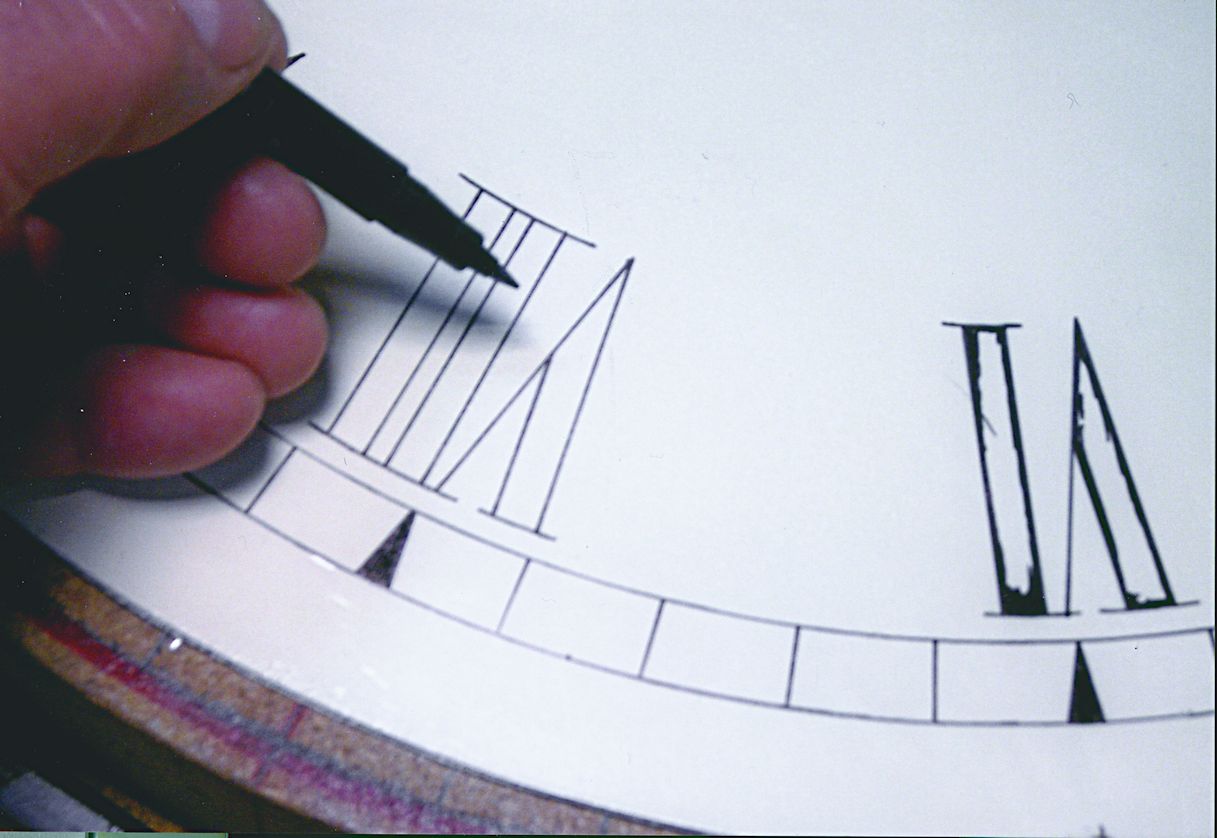
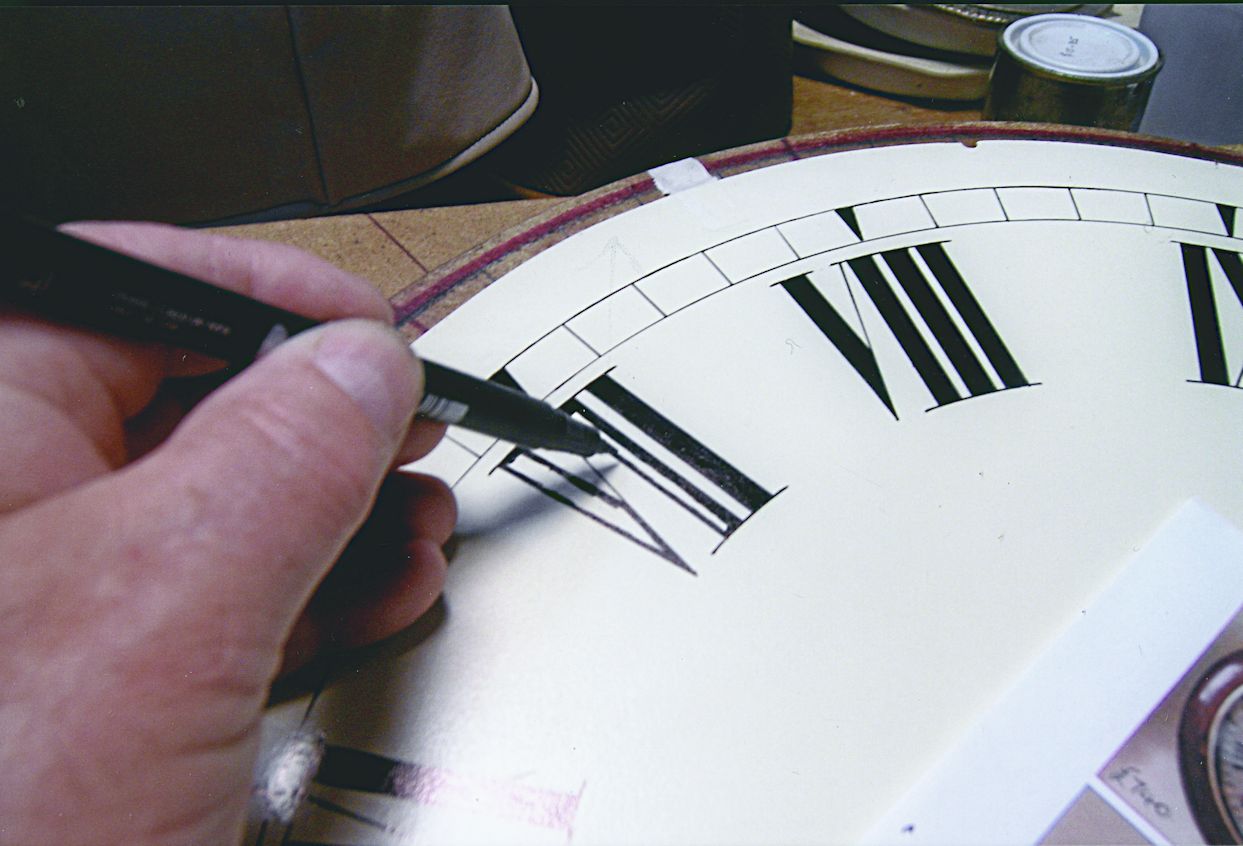
Outline all the numerals around the dial carefully drawing up to the top and bottom serifs. Again turn the dial around so that you are always working in front of the ruler, figure 8 and 9. Do one, or several lines, and then turn the work around to complete the other side. If you make a mistake and go over the line, and such things do happen when your partner suddenly pops up in front of you to announce ‘tea-time’ in a loud voice! Well, you can easily scratch out the offending bit with the craft knife. Use the blade held as flat as you can to the dial surface to avoid leaving visible marks.
The next step is to fill in, freehand, around the inked in outlines, turning the work around as before, see figure 8. This makes it easier to then fill in the rest of the numerals and you can use a pen with a broader point. If your fine point pen has lost some of its’ ‘fineness’ it can be useful to employ it on filling-in numerals before discarding it. Work in long, overlapping, parallel lines to complete this part of the work, figure 9. Felt pens tend to run dry if you hurry them too much so this can encourage you to work slowly and carefully.
The basic dial is now complete. If there is a place or makers’ name to be added, you have several options. If you are pretty nifty at the artwork required then do it by hand, over a lightly traced pencil outline. Be as accurate as you can to the original. Use ink, pen or brush as appropriate and practise a few times on paper to get the spacing right and a confident touch to the letters, before committing yourself to making marks on the dial.
Another option is to use rub-down letters, such as found at craft shops, if you can find the right style of letter that you need. They work quite well and avoid an amateurish look if you get the letters level and the spacing between them right. The final option is to take your new dial to a professional for this finishing, but so important, touch that will ensure that your new dial is as close to original as possible.
Now you can look at the completed dial with a critical eye and tidy up any mistakes, such as a wobbly line, or where the line has gone over the edge. With some form of magnification, such as magnifying glasses, you can really see in close detail and make corrections with a new line or the use of the craft knife blade. Don’t forget to hold the knife blade down close to the work so that the action is a scraping rather than a cutting one.
Let the dial dry and harden up for a few days before being tempted to apply any protective clear finish. Automotive clear spray or an acrylic clear craft spray or fixative will give good protection to a new dial that you have made yourself but be careful that it doesn’t cause blackwork to run and spoil all your work. Test out any spray finishes first and even so, apply the first coats very, very, sparingly, just a ‘sprinkle’ of the spray and allow to dry before adding more. This will seal the surface and help stop any tendency to run.
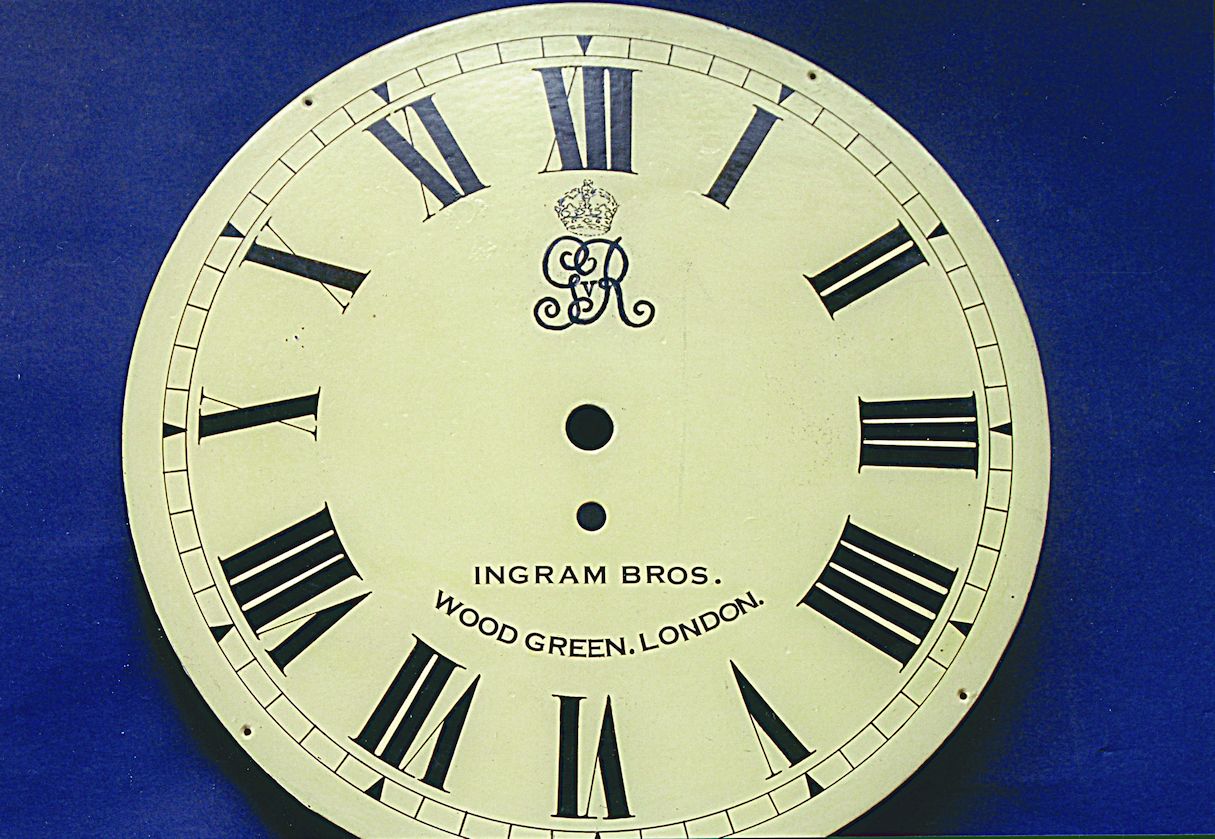
If it is an antique dial that you have repainted then it is better to use a clear finish that is easily removable. A coat of clear wax polish works well. I use an artist’s wax-based varnish that I apply with a brush and then polish it with a soft cloth over several days while it hardens. It gives a slight sheen that looks natural and not over bright and is easily removable with turpentine. Figure 10 shows the finished dial. Figure 11 shows another example, this time a copy of an original dial that had ‘heavier’ numerals giving a less elegant effect.
Download a pdf of this article
|
|

